Creating the floral sampler hoop for the September 2021 Hopebroidery Box
- Aug 9, 2021
- 4 min read
Updated: Aug 18, 2021
Each month, I send subscribers to the Hopebroidery Box a pattern and full-length, step-by-step video tutorial for that month's project; subscribers to the big box also get all the supplies they'll need for their project, including full skeins of embroidery floss, fabric, embroidery scissors I curate specifically for that project, and more. You can take a look at past boxes that have been sent out by visiting the "kits" section of my shop (I keep up the "sold out" kits so that you can see what sorts of supplies and designs have come in past boxes, even if they're no longer available).
I've started to write blog posts about how I design each month's project because I think it might be interesting (even if you're not interested in a box!), and also because I think it's helpful to see the different ways I go about designing the hoops themselves.
Today, I'll share the process of creating the floral sampler hoop for the September 2021 box, a project featuring florals in orange, yellow, red, and white; vines in green, blue, and white, and three tiny creatures (a ladybug, butterfly, and flying bee).
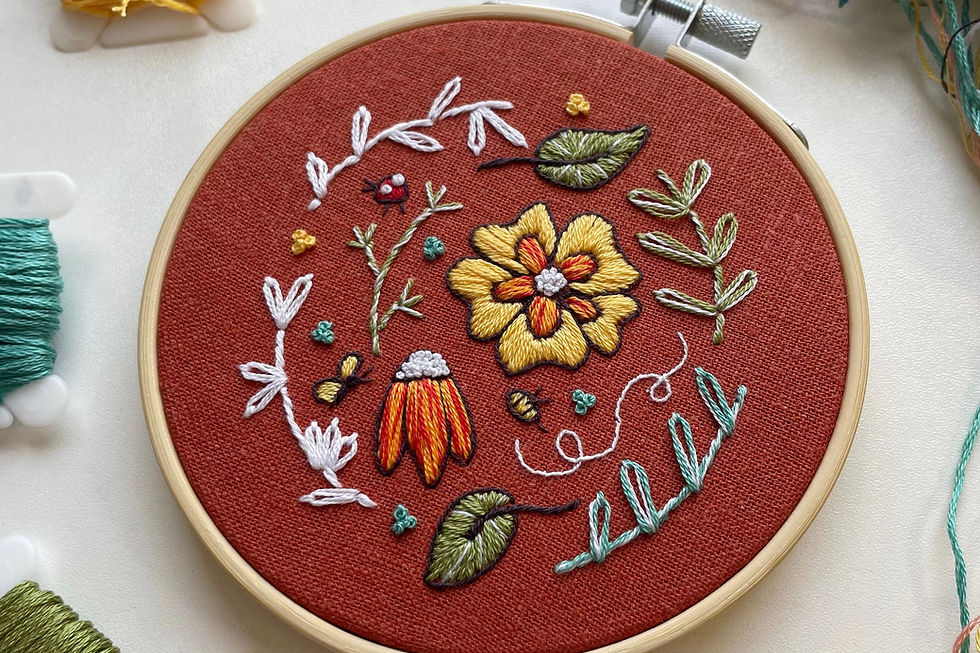
I refer to these sorts of hoops as "floral samplers" because they incorporate several different flower types and stitches into one hoop. The idea is that if you learn to stitch a project like this, you'll be learning all sorts of new techniques along the way!
I love stitching floral samplers for box projects and personal projects alike, as they let me play around with new techniques, fun color combinations, and interesting compositions.

The last floral sampler box project was released much earlier this year, in February (you can take a look at that kit here!). If you've been following me or the box for some time, you know I like to change up the "themes" of each box month-to-month; this ensures that I don't get bored, that subscribers don't get bored, *and* that subscribers who are in the subscription for a more limited amount of time get exposed to lots of different ways to stitch!
Now that we're at the end of Summer, I thought it was time for our second floral sampler of the year! For September's project, I decided it would be fun to play around with warmer colors and to add a few small creatures for added detail and fun.
My first step was to take a page from my sketchbook and draw out a potential design using the Procreate app for the iPad. This allows me to create a workable pattern and to start thinking about what color combinations I might use. You can watch a video replay of that process here:
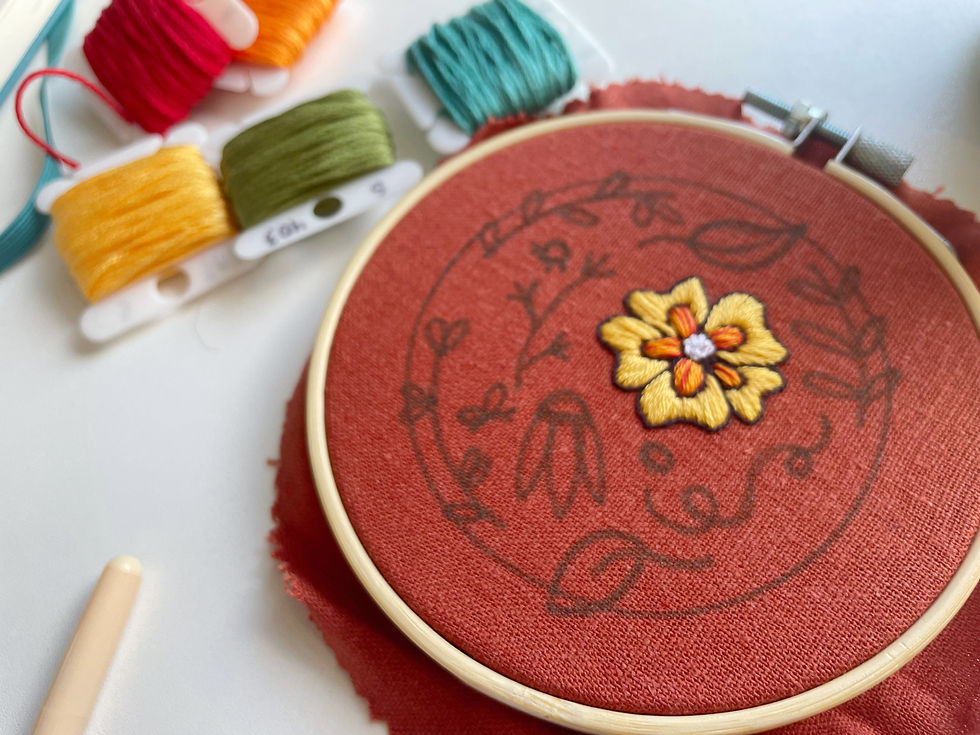
I did a rough transfer of the design onto my fabric using a blue water-erasable transfer pen, went through my Sublime Stitching colors to pick out what I'd be working with, and started to stitch my sample. In the photo below, you can see a glimpse of my "pattern notebook," where I take detailed notes on my patterns as I stitch. This helps me to create more accurate patterns later!
Throughout the process of stitching, I try to take photos of my work to help me "see" what I'm doing more clearly, even if the lighting isn't ideal! I also gave myself plenty of time to "sleep on it," which means that I took frequent breaks so that I could return to the project with a fresh perspective. Although I think these are always important steps to take, they were especially helpful for this project as I was incorporating a few components that were just outside my comfort zone.
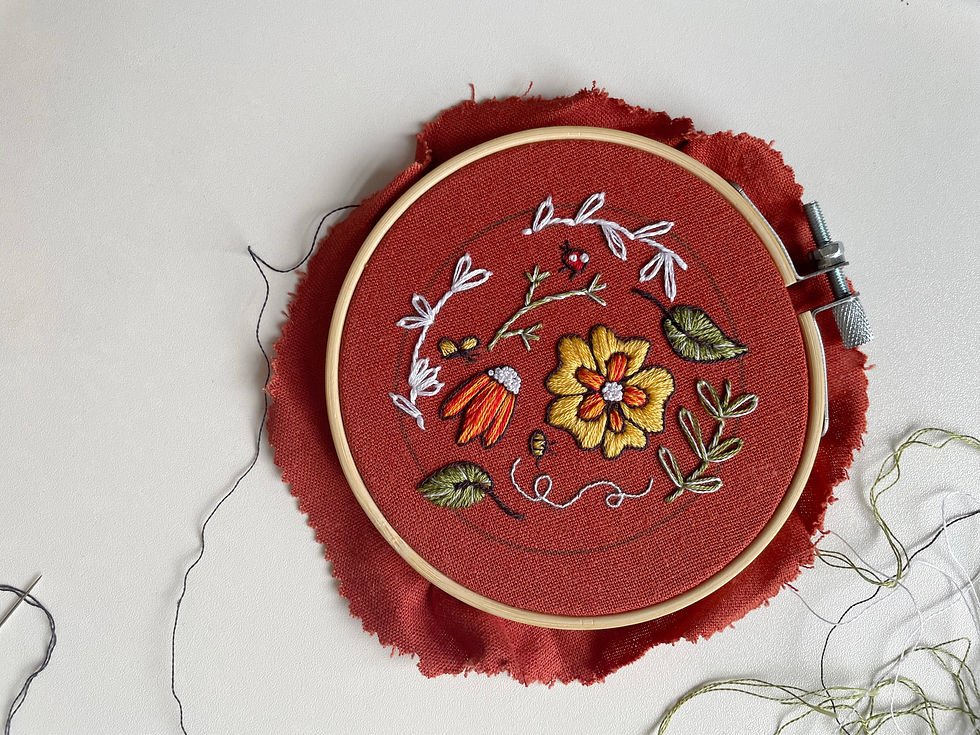
I wasn't sure where to go once I got to this point in the process, so I washed off my distracting transfer marks and gave my hoop time to dry in the sun.
I then took a photo of my work in progress and used the Procreate app to figure out which elements might be missing. You can see digitally drawn lines in the photo below, which helped me to figure out how to finish up this design.

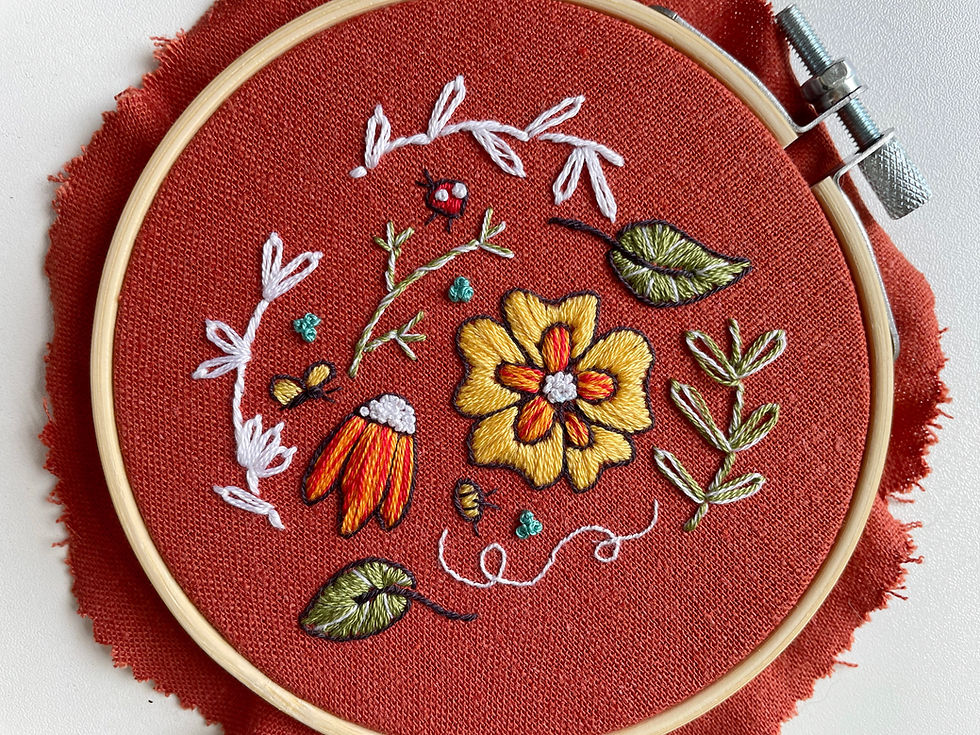
After backing my hoop, I had a finished sample!
As I'm working on the sample hoop, I'm also doing other things for the box, including ordering the scissors (you can find extra box scissors in my shop!), deciding which transfer method will work best, cutting fabric, purchasing floss (which I buy from Sublime Stitching), and... so many other steps!
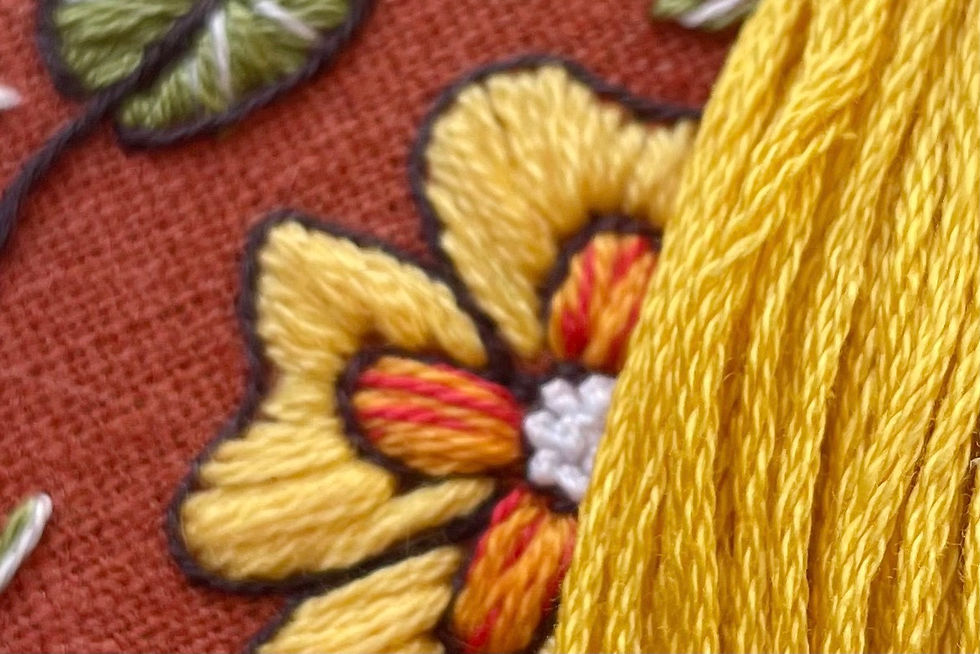
My first step after finishing the sample hoop is almost always to purchase the floss. Very, very rarely, one of the colors I used will be out of stock and I'll have to find the next best choice. In the photo below, you can see that the yellow I ultimately chose for our kit (as seen in the foreground) is a bit more saturated than the original yellow from the sample (as seen in the background). This turned out to be a happy accident, as I like this shade of yellow much more than the original!
The process for putting together your box projects each month involves so many steps, but the best part is creating something that you will want to recreate with me! I can't wait to see what you make with this kit!
Subscriptions for the September 2021 Hopebroidery Box are open through the end of August 2021, and boxes will be in the mail the first week of September! If you're here late, you can always check to see if I have extra boxes available on the "kits" section of my shop! Happy stitching!


Comments