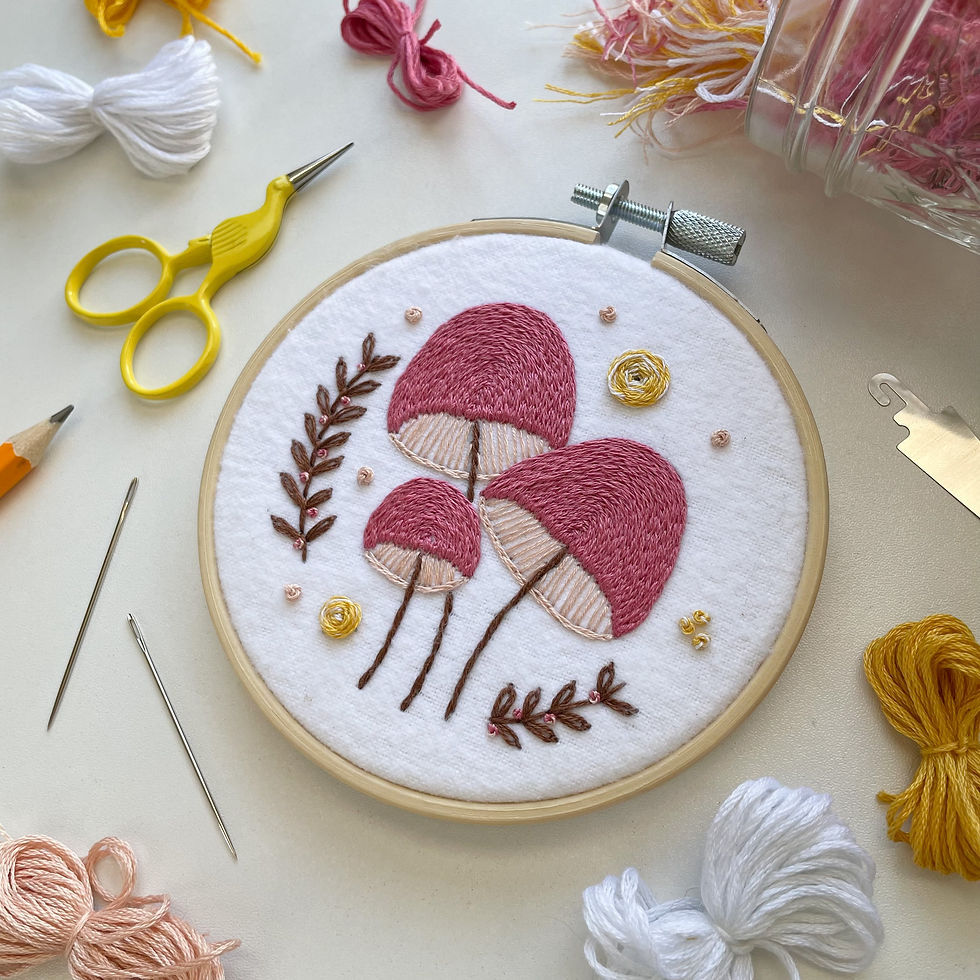
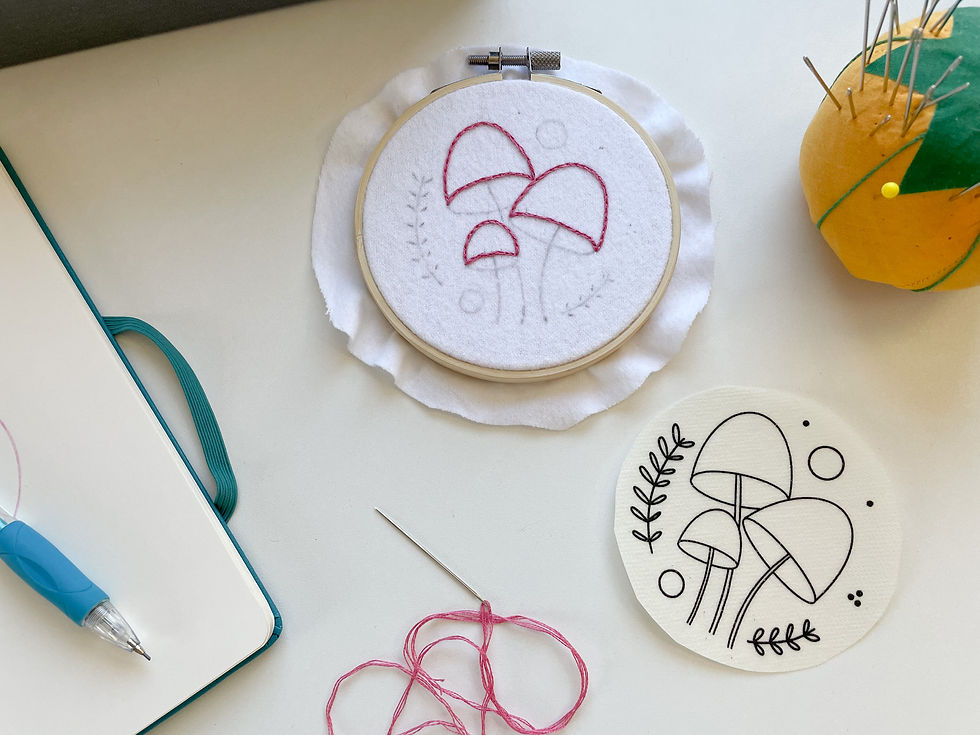
Creating the pink mushrooms hoop for the March 2022 Hopebroidery Box
- Feb 9, 2022
- 6 min read
Each month, I send subscribers to the Hopebroidery Box a pattern and full-length, step-by-step video tutorial for that month's project; subscribers to the big box also get all the supplies you'll need for your project, including full skeins of embroidery floss, fabric, embroidery scissors I curate specifically for that project, and more. You can take a look at past boxes that have been sent out by visiting the "kits" section of my shop (I keep up the sold out kits so that you can see what sorts of supplies and designs have come in past boxes, even if they're no longer available).
I've been writing about how I design each month's project because I think it might be interesting (even if you're not interested in a kit!), and also because I think it's helpful to see the different ways I go about designing the sample hoops themselves.
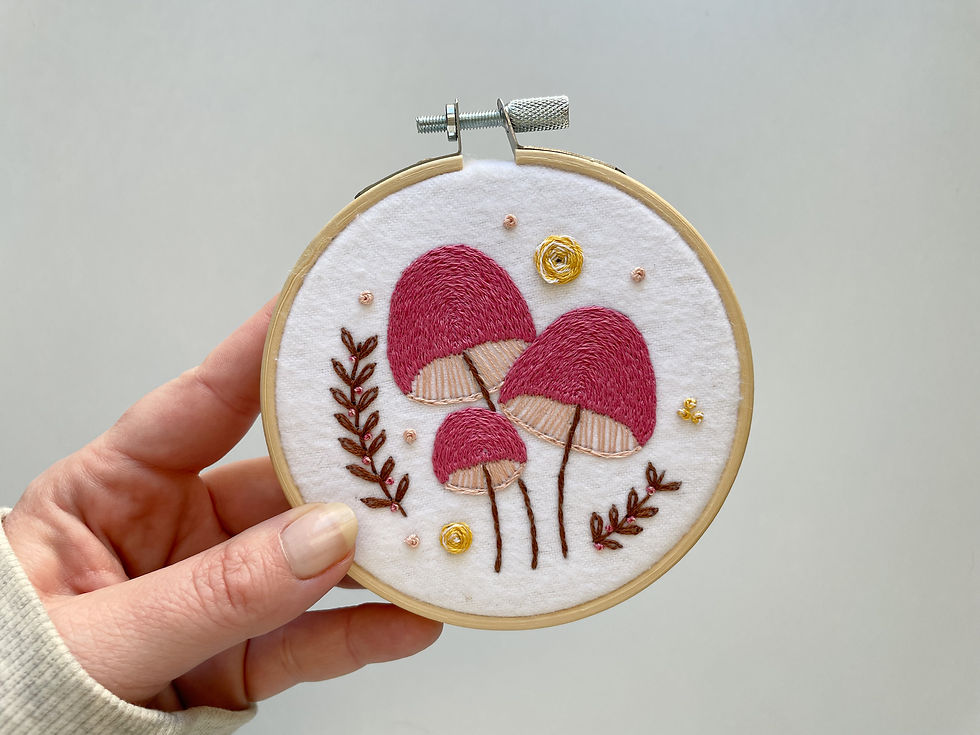
In this post, I share the process of creating the pink mushrooms hoop for the March 2022 box, which features three pink mushrooms stitched onto white fabric and surrounded by florals in pinks, yellows, and brown.
The last mushroom box project was released in October 2021 and featured fall-inspired colors and embellishments. In the blog post detailing the design process for that project, I shared a growing love for (and habit of) drawing mushrooms in my sketchbooks. Once you learn how to draw a simple mushroom, the possibilities really are endless! I decided I wouldn't be able to wait for the fall to create another mushroom-inspired box project, and thought using brighter, more spring-like colors might free me up to include mushrooms as a more regular theme.
The first step was to look through my sketches for a potential design. As I've mentioned in recent design process posts, I've been using homemade sketchbook pages to help standardize and focus my daily sketching, which allows me to quickly generate loads of ideas around a single theme on just one page. I've dedicated a few of these sketching exercise pages to mushrooms, and pulled the design for this project from the page you see below.
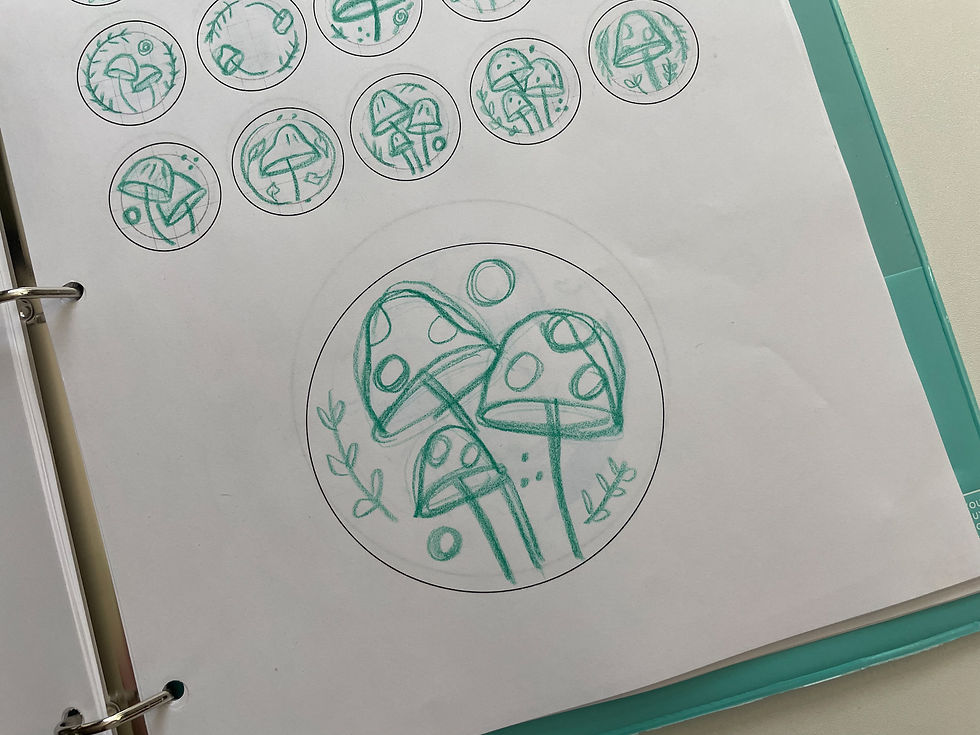
I like to share these rough sketches because I think they help to show new designers that you really don't have to be all that great at drawing to come up with interesting, new embroidery patterns! You can always refine a rough sketch into a cleaner, more workable design later.
Next, I imported a photo of these sketches into the Procreate app for the iPad, which I used to create a "cleaner" sketch to use as a "working pattern" (I'll create the final pattern using the sample itself, which I show you how to do in this YouTube video). I also used this time to think about different potential colors I might use to fill in the pattern itself. You can see a timelapse of that process below.
I think it's interesting to share this portion of the process, but I really want to emphasize that the above is an optional step - especially if you're newer to designing your own projects! If you don't have access to this sort of technology just yet, normal paper will do just fine.
Although the Procreate sketch you see above did turn out to look remarkably similar to my final sample, it took me quite a while to get the actual stitching just right! Some months, I'm able to get the sample completed with just one attempt; others, like this project, took me several re-starts before I was happy!
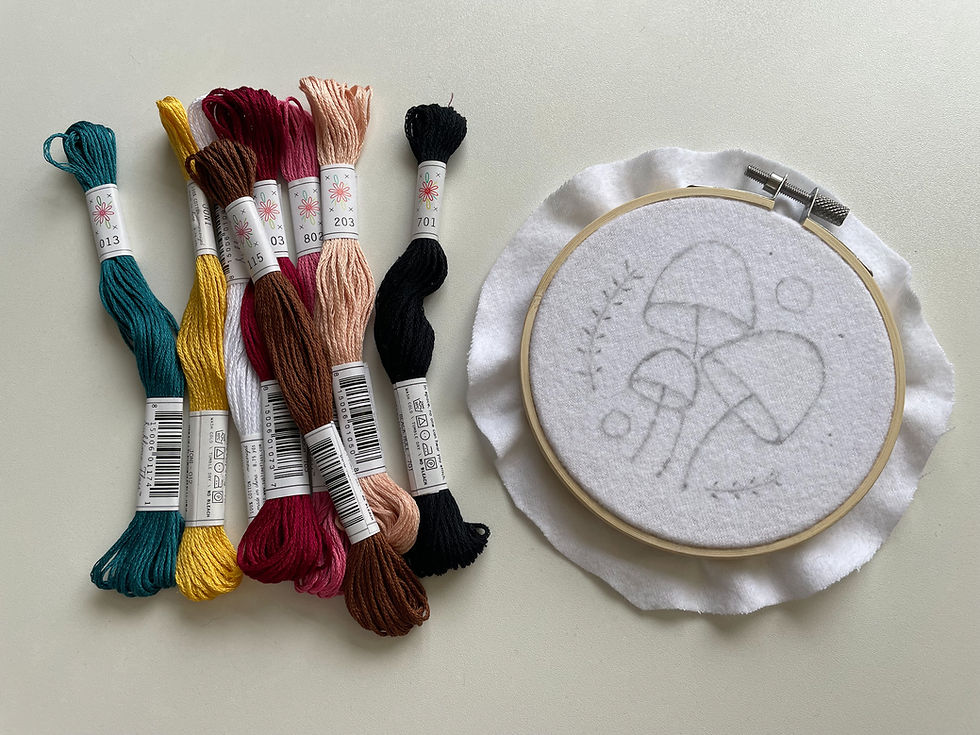
I started by transferring my design onto white flannel fabric using a simple pencil and the "window method" for transferring designs to fabric.
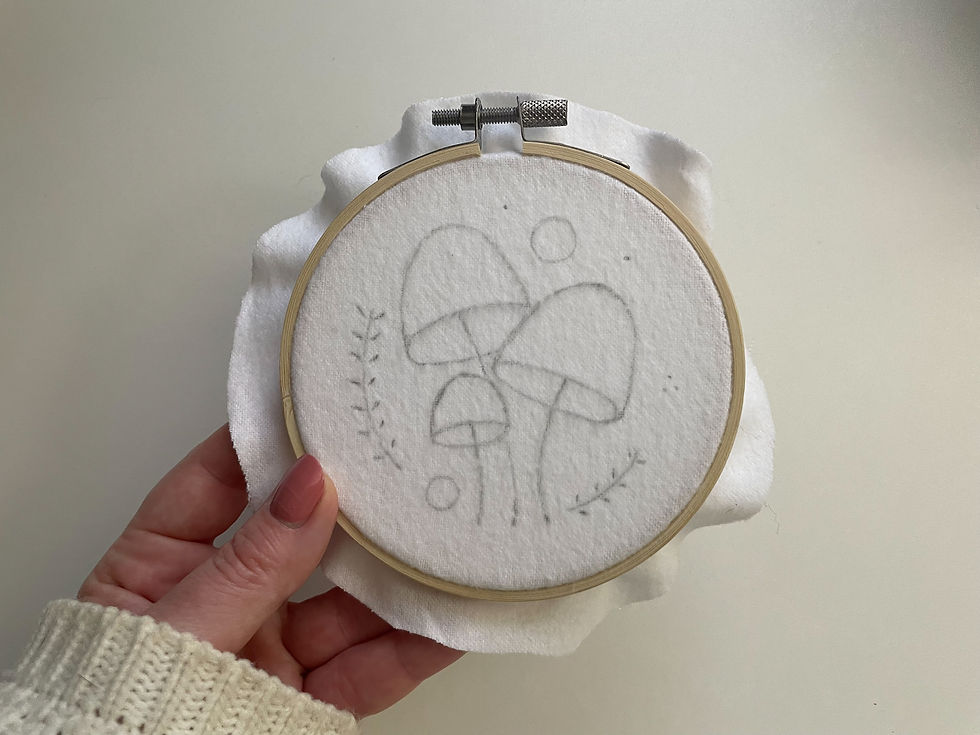
Although I hadn't used flannel for a box project until now, I had been using this same fabric for a few recent personal projects and patterns (including Winter Leaves, Vine in a Vase, and the 4" version of the Cross-Stitched Heart). This fabric is so soft and buttery, and turns out to be an excellent option if you're a bit picky about the texture of fabric on your hands as you stitch.
As always, I grabbed a handful of skeins from Sublime Stitching. Not all of these colors ended up in the final sample, but I find that I do a better job of designing projects when I start out with more color options than I really need.
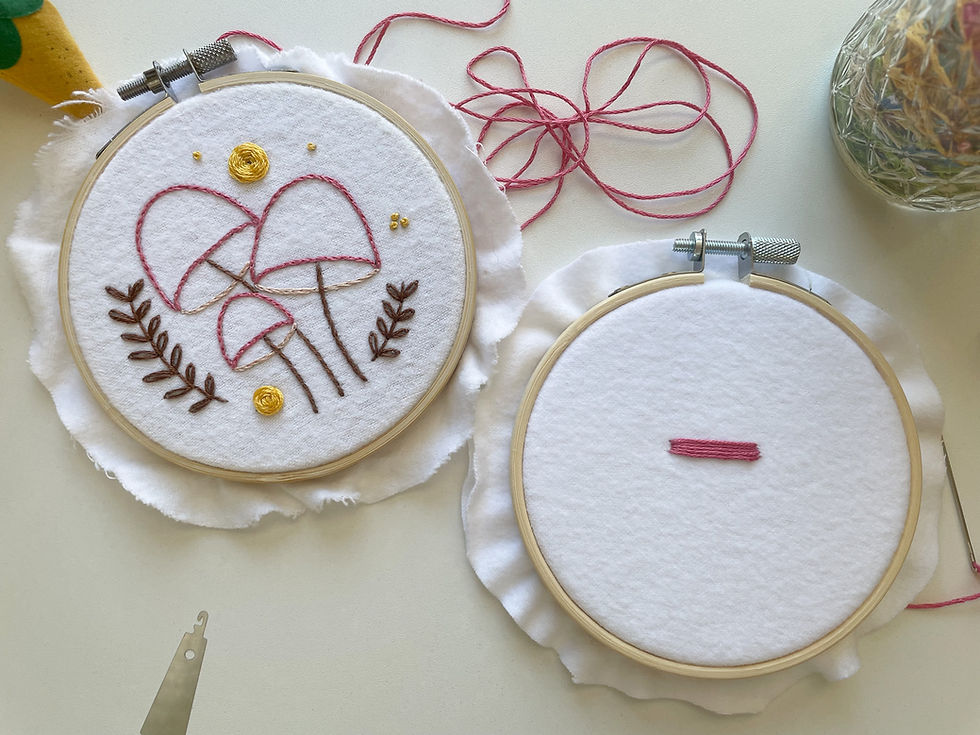
Now it was time to stitch! In the photo below, you can see a few of my initial stitches, along with the corner of the notebook I use to take meticulous notes as I stitch. I find that having these notes helps me to write more accurate and helpful patterns later on in the box-making and pattern-writing process!
Early in this first attempt, I realized that the particular stitching for this project was causing my fabric to pull; you can see a bit of what I mean in the photo below, where I'm pointing to that pulling with my needle.
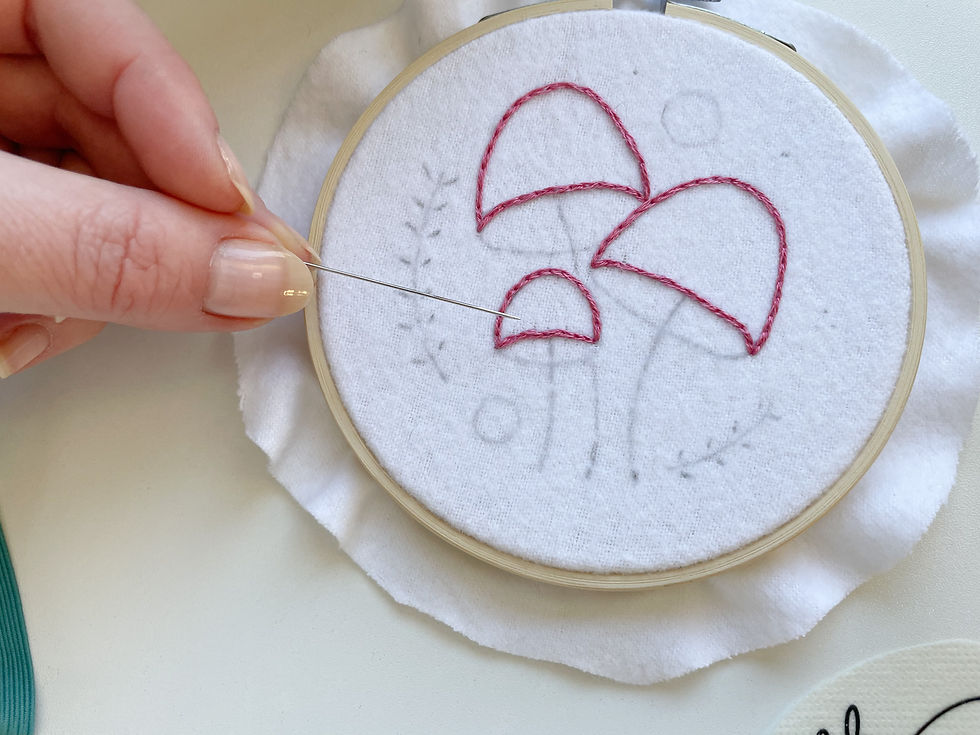
Each month, I work to be sure I'm sending subscribers' the best possible transfer option for that month's particular design and fabric. With this in mind, the pulling I noticed in this first attempt hadn't been an issue in the previous projects I mentioned - the designs for which I had transferred using washable transfer paper. I decided to re-start the project using washable transfer paper as a stabilizer, hoping that would solve the issue.
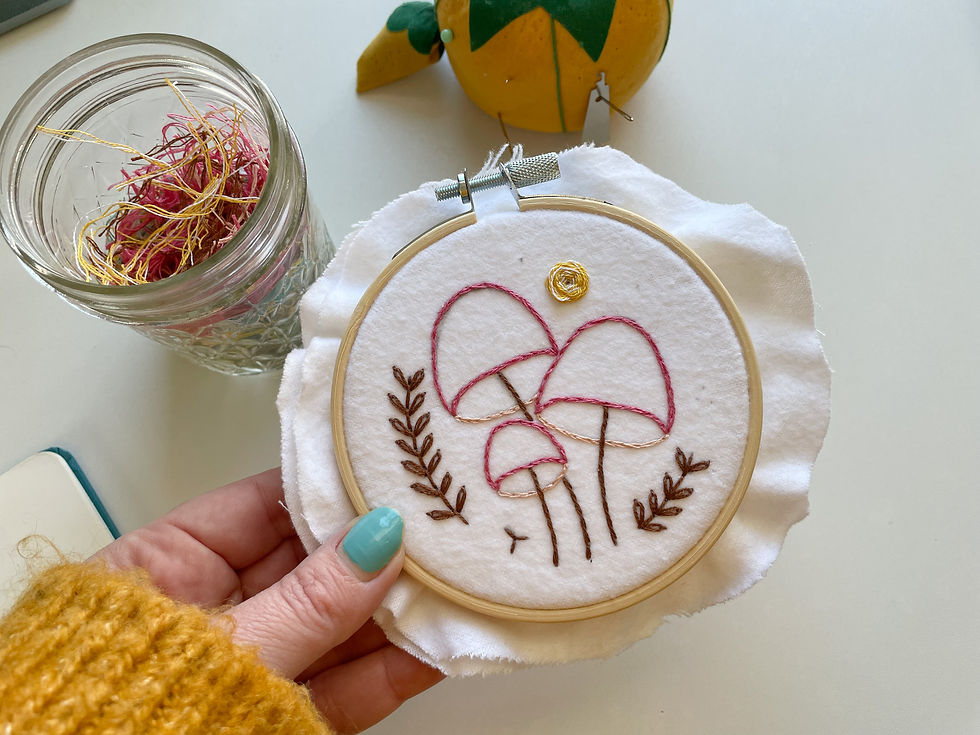
In the photo below, you can see where I've stitched all of the outlined bits of the project. This is the point at which I decided to wash off the paper, as it's a bit easier to do at this stage (versus after filling in large areas, or stitching something as fluffy and fragile as a woven wheel rose or rosebud).
In the photo below, you can see what the project looked like once I had removed the paper and allowed the hoop to completely dry. You can see that the paper did, in fact, help with the pulling issue from my first attempt!
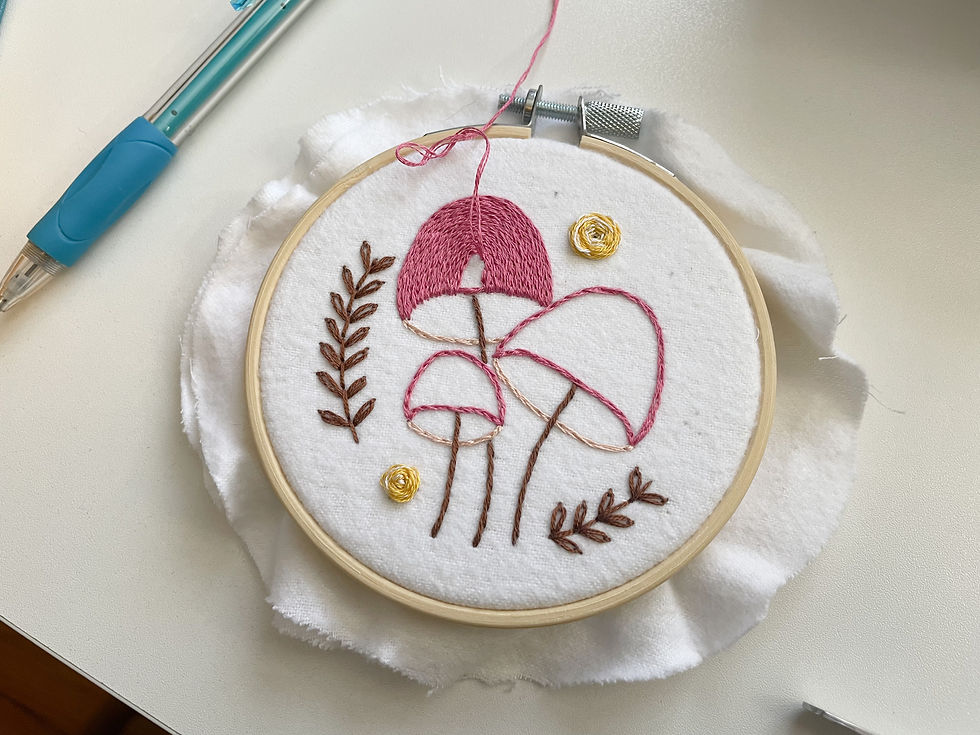
Next, I started to work on the flowers and embellishments that surround the mushrooms. Again, the fabric was working just fine at this stage - and I was feeling pretty relieved!

Once I finished the surrounding flowers and embellishments, I began to fill in my mushrooms. Unfortunately, the fabric pulled - again! This, of course, makes total sense, and it's ultimately a bit embarrassing that I didn't predict it would happen. To fill in the area, I would need to remove the paper, and no paper would mean messy, pulled fabric.
In a fit of near-rage, I did not take a photo of that second failed attempt. Instead, what you see below is the attempt with those filler stitches cut out, next to a hoop where I've attempted to troubleshoot the issue one more time. The hoop on the right has two layers of flannel fabric, along with a few quick stitches I used to test whether having two layers might be the solution to my pulling issue after all. Not only was it absolutely the solution - but just look at the bright, thick color of this fabric when I used two layers of fabric!
As I've written about in previous posts, troubleshooting is an essential part of the process - and it usually all works out in the end! I was happy to have finally found my solution, and excited to get started on what would be my third and final attempt at creating the sample hoop!
For this final attempt, I went back to using a pencil and the "window" method to transfer my design to fabric.

Next, I began to stitch. Luckily, I had learned a lot about what I liked in stitching the "failed" attempts earlier. It's all a part of the process!
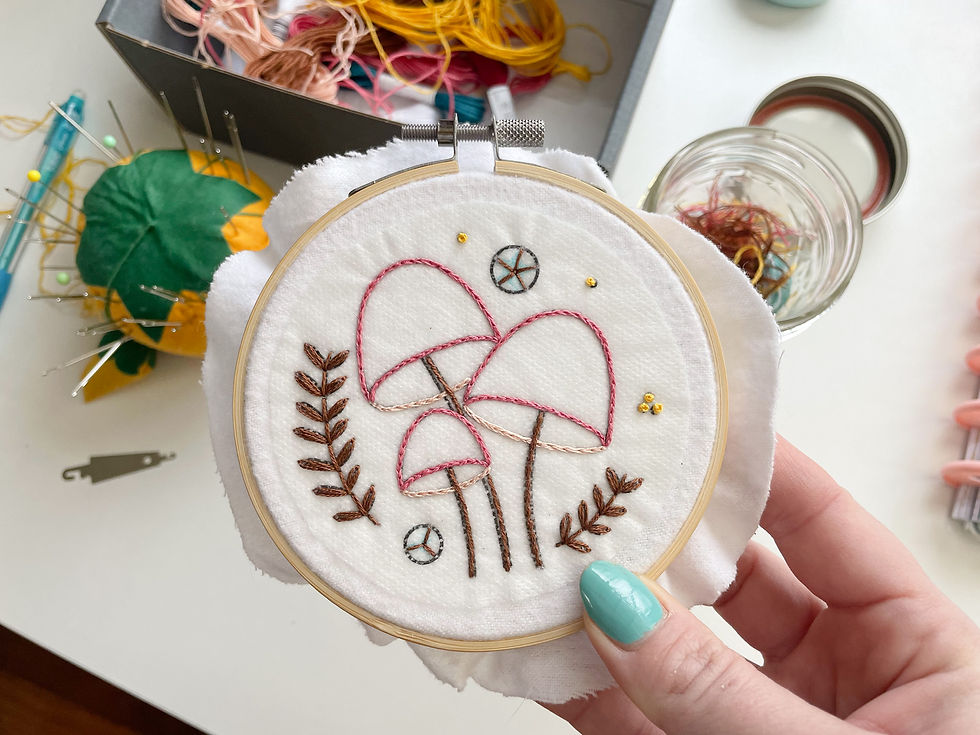
I began to fill in the mushrooms, and look at that - no pulling! I was also really enjoying filling in these with more textural filling techniques than the last mushroom-heavy project.
Once the tops were filled, I started to play around with different ideas for how to fill in the mushrooms' gills.

I thought the filling you see below did a better job of visually representing the gills' structure than satin stitch, and also helped to better differentiate the bottoms of the caps from their "heavier" tops.

In addition to finally being able to fill in the mushrooms, I also used this attempt as an excuse to play around a bit with variegated colors for the surrounding flowers and embellishments. I thought it was turning out quite nice by this point!
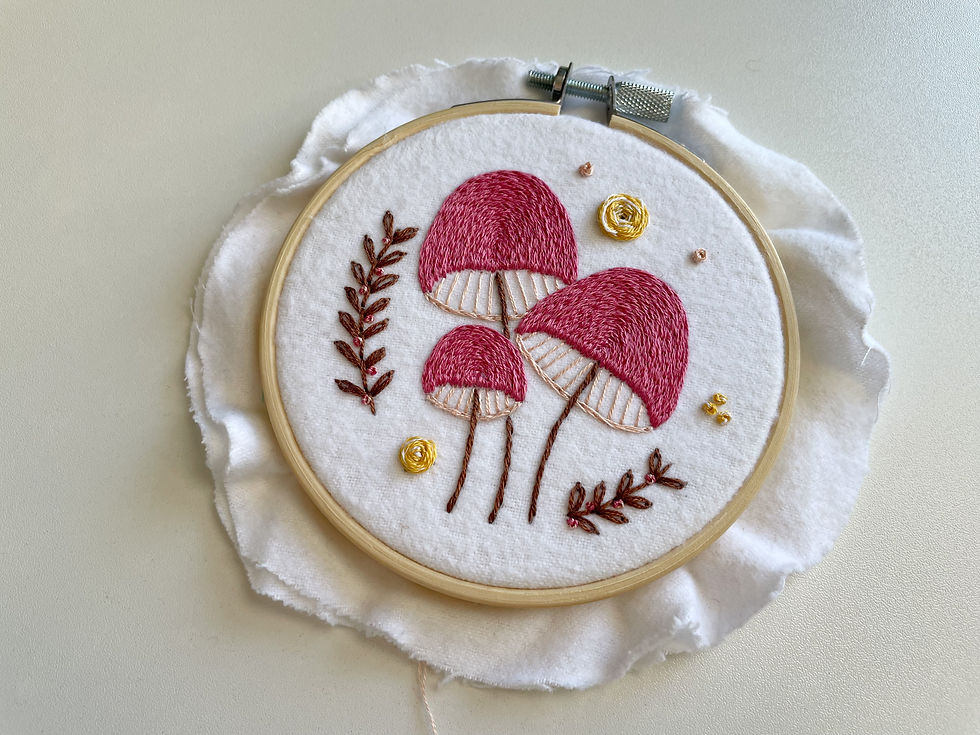
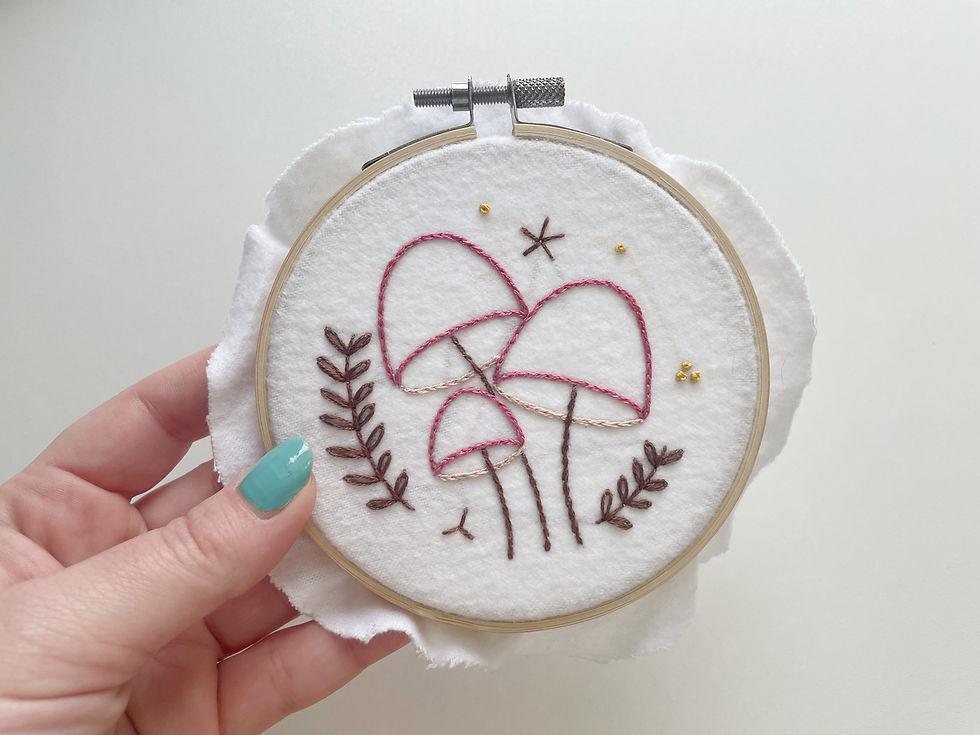
After backing my hoop, I had a final, finished sample!
As I'm working on the sample hoop, I'm also doing other things for the box, including ordering the scissors (you can see the yellow stork-shaped scissors I chose for March in a photo at the top of this post, and find extra box scissors in my shop!), cutting fabric, purchasing and bundling floss, and so many other steps! The process for putting together your box projects each month involves so many steps, but the best part is creating something that you might want to recreate with me! I absolutely love seeing what subscribers' make each month, either on social media or sent directly to me via email - it's such a treat!
Subscriptions for the March 2022 Hopebroidery Box will be open throughout the month of February, and boxes will be in the mail the first week of March! If you're here late, you can always check to see if I have extra boxes available on the "kits" section of my shop!
Happy stitching!


Comments