Creating the floral sampler hoop for the July 2022 Hopebroidery Box
- Jun 15, 2022
- 5 min read
Each month, I send subscribers to the Hopebroidery Box a pattern and full-length, step-by-step video tutorial for that month’s project. Subscribers to the physical box also receive all the supplies you’ll need for your project, including full skeins of Sublime Stitching embroidery floss, a large cut of fabric, embroidery scissors from Kelmscott Designs, and more! You can take a look at past boxes by visiting the kits and digital patterns sections of my shop. (I keep the sold out physical kits viewable in the shop just in case you want to see what sorts of supplies and designs have come in past boxes, even if they’re no longer available!)
For the past year or so, I’ve been writing about how I design each month’s project in hopes that it might be helpful to see the different ways I go about designing the sample hoops. I hope it’s helpful to you (if you’re a newer designer looking for examples of how this process might work), and also find that it’s been helpful to me (taking the time to process how each project comes to life is informative to my future work!).
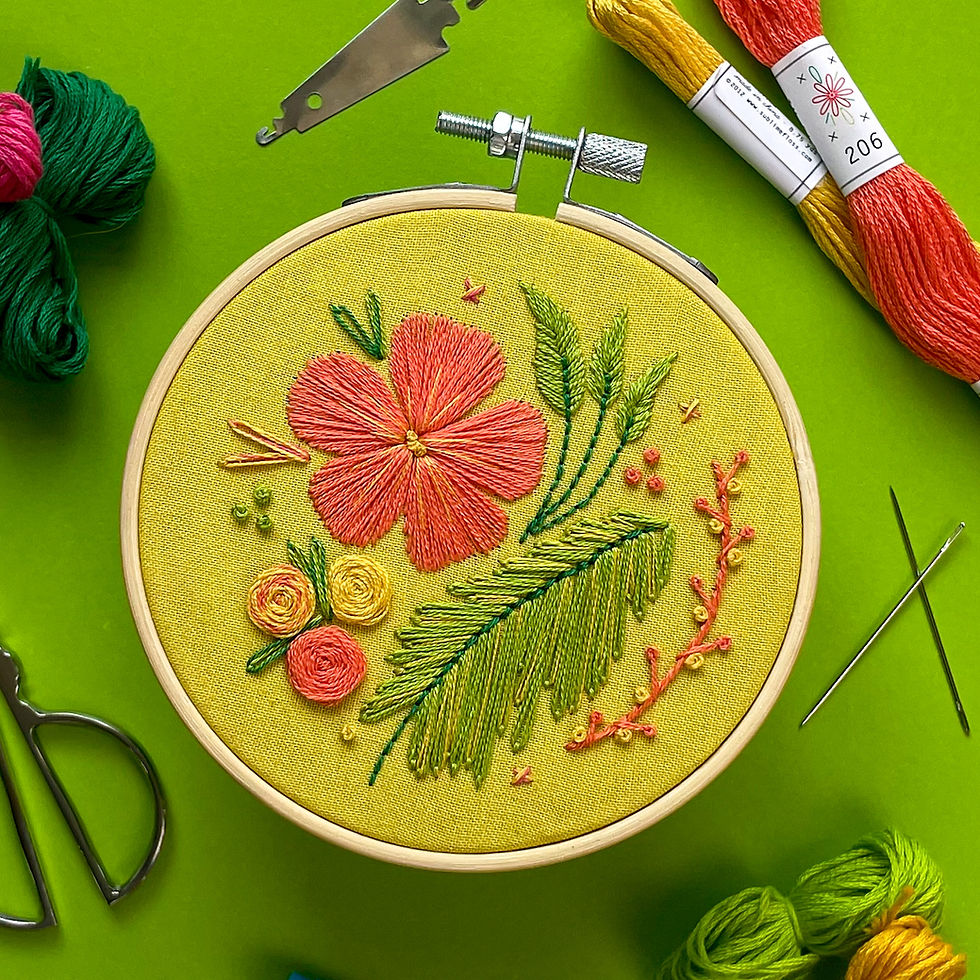
In today's post, I share the process of creating the floral sampler hoop for the July 2022 box, pictured above! July's project features colorful flowers, leaves, and vines stitched onto a bright yellow-green cotton fabric.
Creating the sample hoop: A behind-the-scenes look into this month's process
This month, I started by grabbing a cut of bright yellow-green cotton fabric and a handful of colors from my collection of Sublime Stitching embroidery floss. When stitching the sample, I like to have loads of different possible colors from which to choose, narrowing down the palette as I stitch.

Next, I took a look through my sketchbook -- where I've produced loads of possible "floral sampler" themed designs -- looking for a sketch that would work with the colors I was hoping to use and that felt different, compositionally, to our last floral sampler box project (released in February as a kit and digital pattern). I imported my favorite sketch, which features a geranium-inspired flower, roses, leaves, and a fern-like design, into the Procreate app for the iPad, which I used to create a "cleaner," easier-to-transfer pattern. You can see a brief timelapse of that initial process in the video below.
I've used this fabric for a few projects, so I already knew that blue water-erasable transfer pens would be a great match for transferring the final design.

After creating a space for detailed notes in my pattern notes book (which I shared a photo of in last month's design process blog post), I was ready to start stitching!

Compared to the floral sampler subscribers stitched with me earlier this year, July's design has a more "scattered" appearance (reminiscent of the project subscribers stitched with me in September of last year). When stitching a more scattered floral sampler like this, I'll sometimes start by using that first color of floss on various elements of the hoop to help to give it a "balanced" look before adding in additional colors.
In the photo below, you'll see I started by using an orange-peach color of floss to stitch the flower on the top left portion of the hoop. After adding in a few yellow embellishments and highlights to that first flower, I pivoted toward using the "color balancing" semi-technique by using the orange-peach color to stitch a rose on the bottom left portion of the hoop.
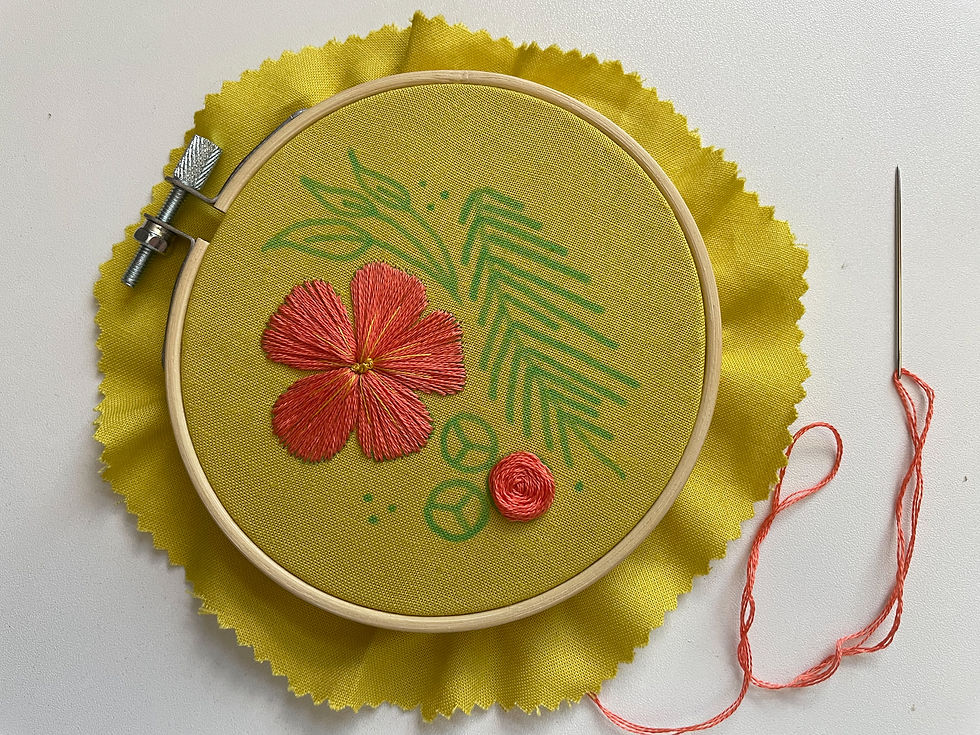
Finally, I used the peach-orange color to add in three small embellishments on the top right portion of the hoop... which I didn't take a photo of (oops!) before moving onto my next color, light green. You can see those first two colors (orange-peach and light green) placed using this "color balancing" semi-technique in the photo below.

As I write, I'm realizing this may be the first time I've tried to explain how or why I might approach a project in this way! The "how" seems simple enough: place one or two colors down before moving onto the rest of your palette. The "why" is, perhaps, two-fold: one, it helps me to create a balanced overall "color story"; and two, it prevents me from becoming overwhelmed with color choices. Hopefully that makes enough sense for the purposes of this post!
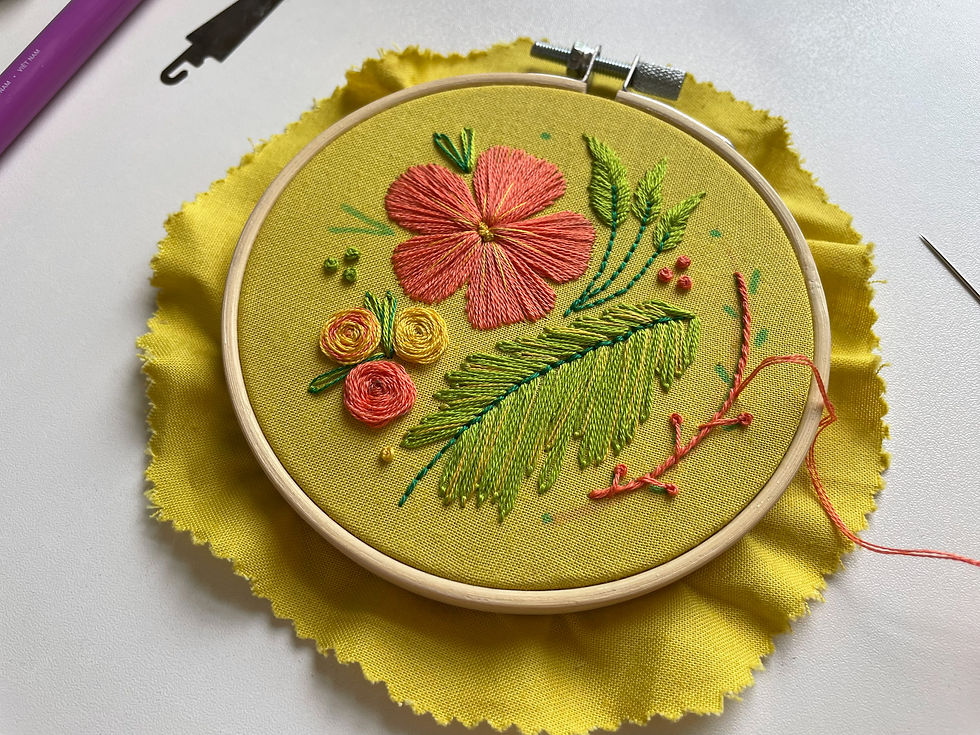
In the photo below, you can see what the project looked like once I started in adding another shade of green, more of that yellow I had originally only used as accents and highlights, and a bit of variegation as well. At this point, I thought for sure I'd be able to finish the project without having to unpick anything -- a rarity for box project designs!

I was wrong, of course! Below, you'll see a bit of stitching that I eventually unpicked (bright pink cross stitches and dark green French knots).

Once I took those stitches out and re-evaluated the color story of the piece, the rest of the project did flow quite easily! In the photo below, you'll see I've added in that darker green color by variegating it with the lighter green; I think this helped me to incorporate more of that darker green without having the embellishments overwhelm the existing portions of the design. I also began to add in more of that orange-peach color to the right of my design, which was starting to feel too empty and green-heavy.
After a few more embellishments, I was ready to wash off my transfer marks and back my final sample!
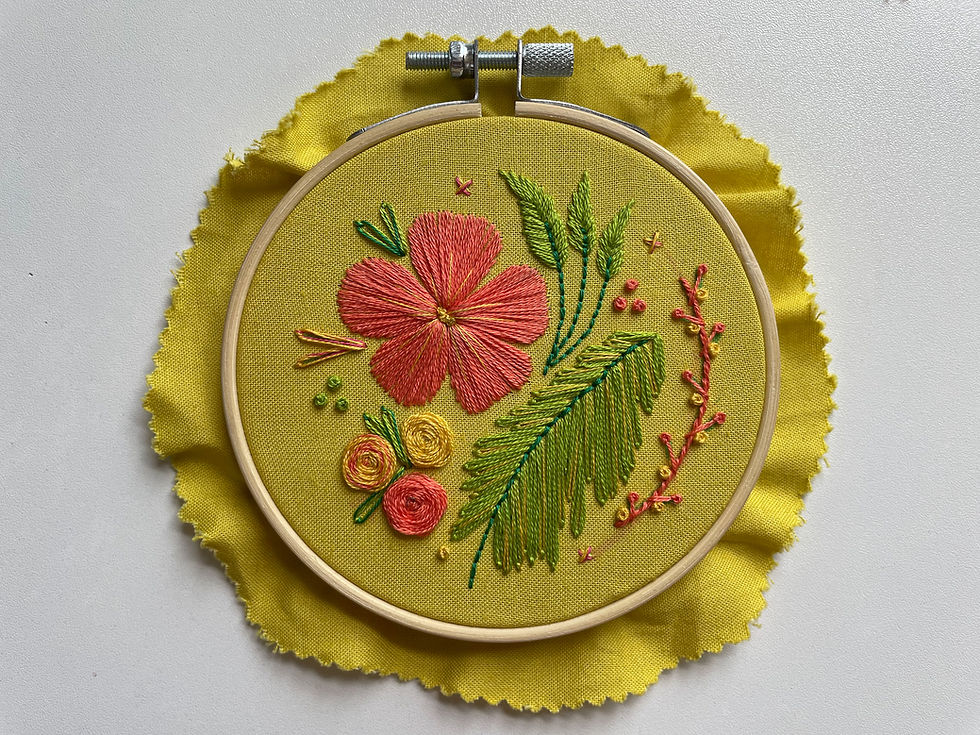
I think the final product turned out rather nice!
I hope subscribers love stitching this project with me as much as I loved creating the initial sample!
It's not all about designing the sample projects, though!
As I’m working on the sample hoop, I’m also doing other things for the box, including choosing and ordering that month’s scissors (you can find extra scissors from past boxes in the supplies section of my shop!), cutting fabric, purchasing and bundling floss, and loads of other steps that eventually come together into neatly packed embroidery kits.
The process for putting together your box projects, kits, and patterns each month works a bit like a puzzle for me, and I absolutely love it! That said, the best part is creating something that you might want to recreate with me; I absolutely love seeing what subscribers make each month, either on social media or sent directly to me via email -- it’s such a treat!
Interested in stitching this project with me?
Subscriptions for the July 2022 Hopebroidery Box will be open throughout the month of June, and subscribers’ boxes will be in the mail (and patterns sent to your email) the first week of July. I know subscriptions can be super confusing at times, so please feel free to reach out to me directly via email if you have any questions whatsoever before subscribing!
Thank you for being here, and happy stitching!
Thank you so much for being here! I truly appreciate you, whether you’re here to shop or simply here to learn! If you’re interested in embroidery kits, but don’t think mine are the right fit for you, check out my post all about how to choose an embroidery kit -- I want to help you find the right fit for you, even if it’s not with me!
Happy stitching, happy summer, and I’ll see you next month for another box design process post!


Comments